こんにちは!
CocoonカスタマイザーのYoshitaka(@yandkstudio_y)です。
今回は、ブログのサイドバーデザインを参考にさせて欲しいという依頼が舞い込んだので、弊ブログ風にサイドバーをデザインするカスタマイズ方法をご紹介します!
CSSのコピペと、外観からウィジェットを追加するだけなので、とても簡単ですよ!
完成イメージ
完成イメージは弊ブログのサイドバーです。
下画像が少し見づらいと思うので、パソコンで見ている人は実際にサイドバーを御覧ください。

カスタマイズ手順
カスタマイズ手順は以下の通りです。
カスタマイズ手順
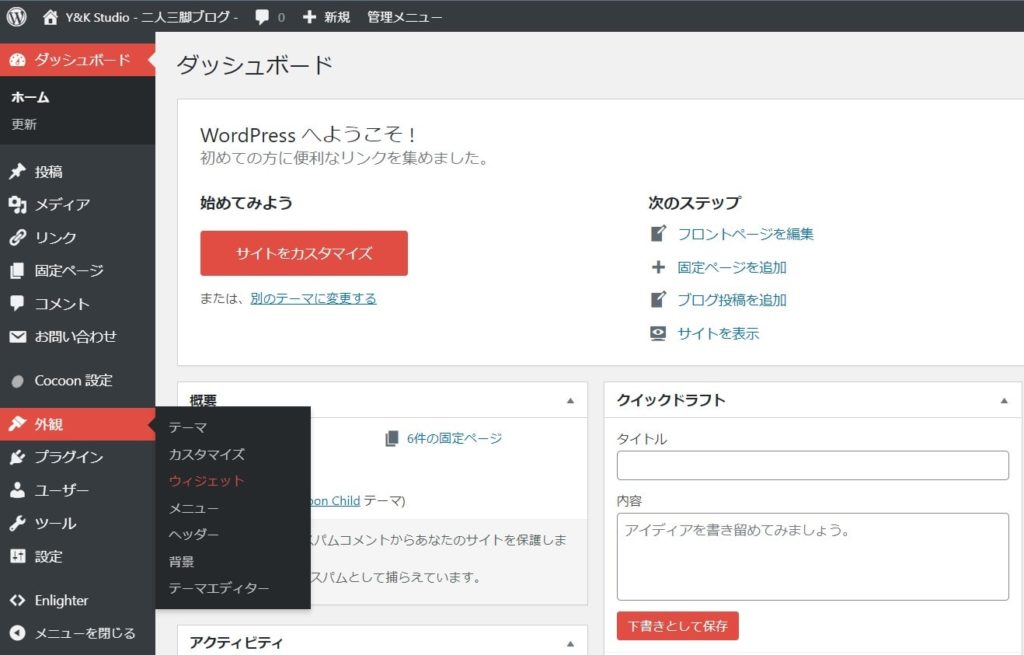
- STEP1CSSをコピー&ペースト外観 > テーマエディター > style.cssにペースト
- STEP2ウィジェットの設定外観 > ウィジェットに表示したい要素を指定
STEP1 : CSSをコピー&ペースト
.sidebar h3 {
  background: none;
  font-size: 16px;
  letter-spacing: 2px;
  display: inline-block;
  position: relative;
  width: 100%;
  padding: 0;
  text-align: center;
  color: #ffc679; /* サイドバータイトルの色を指定 */
}
.sidebar h3::before,
.sidebar h3::after {
  content: "";
  position: absolute;
  top: 50%;
  width: 28%;
  border-top: 3px solid #ffc679; /* サイドバータイトル横のバーの色を指定 */
}
.sidebar h3::before {
  left: 0;
}
.sidebar h3::after {
  right: 0;
}
.widget_categories ul li a {
  color: #333;
  text-decoration: none;
  padding: 6px 0;
  display: block;
  padding-right: 4px;
  padding-left: 4px;
  border-top: 1px dotted #ccc;
  font-size: 16px;
}
.widget_categories ul li a::before {
  font-family: "Font Awesome 5 Free";
  content: "\f07b";
  padding-right: 10px;
}
.widget_categories > ul > li > a:first-child {
  border-top: none;
}
.widget_categories > ul > li > a:last-child {
  border-bottom: 1px dotted #ffc679;
}
.widget_categories ul li a .post-count {
  display: block;
  float: right;
  background: #fff;
  padding: 0 1em;
  font-size: 14px;
  margin-top: 0.2em;
  border-radius: 4px;
}
.widget_categories ul li a:hover {
  background: none;
  transition: 0.5s;
  color: #ffc679;
}
.widget_categories ul li a:hover .post-count {
  background: #ffc679;
  color: #fff;
  transition: 0.5s;
}
.widget_categories ul li ul {
  border-bottom: 1px dotted #ccc;
}
.widget_categories ul li ul li a {
  color: #333;
  text-decoration: none;
  padding: 0 4px 4px 4px;
  display: block;
  border: none;
}
.widget_categories ul li ul li a::before {
  font-family: "Font Awesome 5 Free";
  content: "\f105";
  padding-right: 0.45em;
  font-weight: bold;
}
.author-box .sns-follow-buttons a.follow-button {
  background-color: #fff;
  color: black;
  border: 0px;
}
.author-box {
  border: 0px;
}
.author-box p {
  margin-top: 0.3em;
  line-height: 1.6;
}
.author-box p a {
  text-decoration: none;
}
.author-box p a:hover {
  text-decoration: underline;
  color: #008cee; /* プロフィールにリンクを貼っている場合, ホバーした際の色指定 */
}
/* スマホサイドバー設定 */
#sidebar .author-box {
  border: none;
  border-radius: 4px;
  margin: 1em 0;
  line-height: 1.4;
  position: relative;
  padding: 1.4% 2% 1.8%;
}
#sidebar .author-thumb {
  float: none;
  width: 100%;
  margin: 9px auto 0;
  height: 0;
  padding-top: 75px;
  position: relative;
}
#sidebar .author-thumb img {
  border: 3px dashed #ffc679;
  width: 35%;
  padding: 6px;
  margin: 0 auto;
  position: absolute;
  left: 0;
  right: 0;
  bottom: -25%;
}
#sidebar .author-content {
  margin-top: 16%;
  font-size: 0.9em;
}
コードをコピーすると基本的にY&K Studioと同じサイドバーになると思います。
※上手くいかない場合はコメントください。修正します。
色の変更などは以下のカラーコードなどを見て各自修正してください。
コメントに書いてあるので大体わかると思いますが、もしわからない場合はTwitterやメール、コメント頂ければ個別に対応します。
STEP2 : ウィジェットの設定
WordPressnの管理画面から外観 > ウィジェットを選択します。

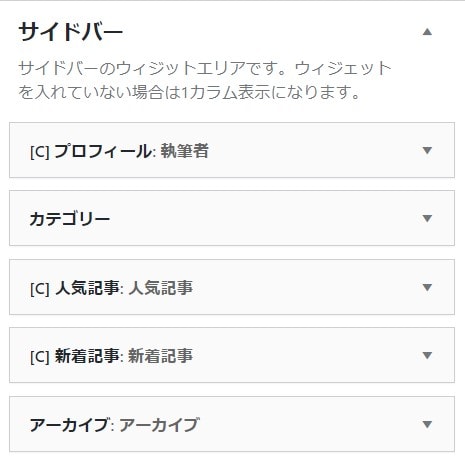
Y&K Studioのウィジェット内容は以下の感じです。
基本的にウィジェットに何を表示するのかは個人の自由だとは思いますが、人気記事やプロフィールといった情報は表示しておくべきだと思います。

以上の様に設定したら完了です!
お疲れさまでした。
Cocoonカスタマイズしています
今回は、サイドバーのカスタマイズ方法をご紹介しました!
これ以外にもCocoonのカスタマイズ記事を多数記事にしていますので、ご覧ください!


コメント
[…] 主にこちらのページを参考にしています。 […]
[…] 主にこちらのページを参考にしています。 […]
お世話になっております。
今回、こちらのサイドバーを利用させて頂いたのですが、
マウスオーバーしないと、カテゴリーや新着記事のタイトルが出てこないようになっています。
何か改善点などあればご教示頂けると幸いです。
先ほど、コメントしたのあというものですが、
解決いたしました。
背景色を変更していたことが原因だったようです。
記事を参考にさせて頂いております。
プロフィール写真の周りにある点線を削除して使用したいと考えております。
その場合、CSSをどのようにすれば良いかご教授いただけますでしょうか。
よろしくおねがい致します。
サイドバータイトル横のバーを細く・短くしたいのですが、どうしたらよいでしょうか?
サイドバータイトル横のバーを細く・短くしたいのですが、どうしたらよいでしょうか?
コメントありがとうございます。
以下のcssを設定していただくとサイドバーの長さを変更することが可能です。
###
.sidebar h3::before, .sidebar h3::after {
content: “”;
position: absolute;
top: 40%;
width: 28%; ←この部分を変更してください
border-top: 3px solid #036;
}